RDP Connection “An internal error has occurred.”

You generally see this error message on a Windows PC running RDP Client. This is the result of modifications done to RDP settings. You might see this error when someone changes the local group policy’s security settings. This is a common error.
We believe the probable reasons for this issue are related to RDP connection settings, RDP security, and Computer Domain connectivity. We have created a complete list of solutions to fix this issue.
PLUS: If you see this error when connect with domain name, try use IP address first!!
Solution 1: Restarting the RDP (Remote Desktop Service)
Sometimes restarting a service or a process removes the glitch. The same works for RDP connectivity. You can try restarting it when you face an internal error in RDP.
Try the following steps:
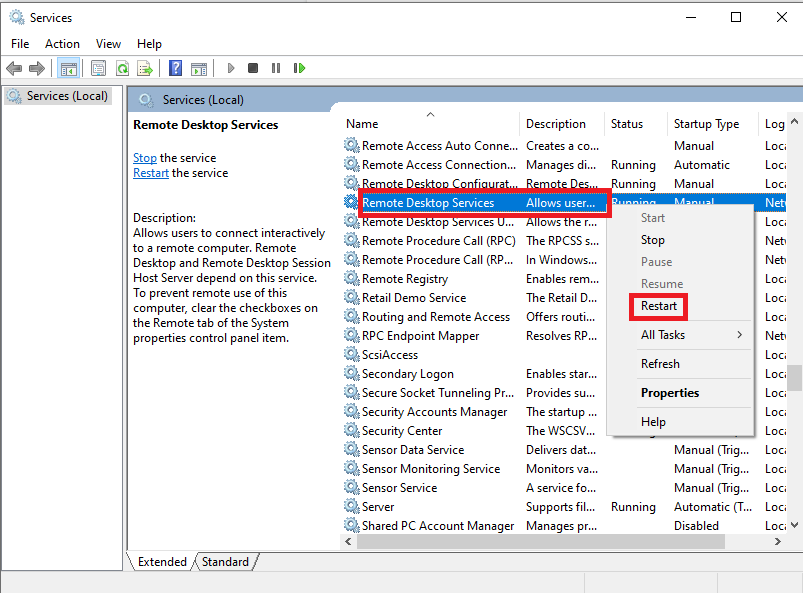
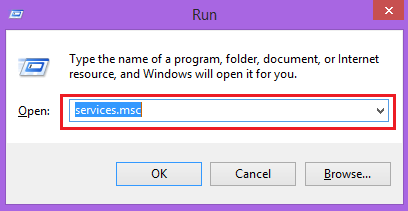
- Press the Win+R combination to open the Run command.
- Type the command Services.msc and press OK.

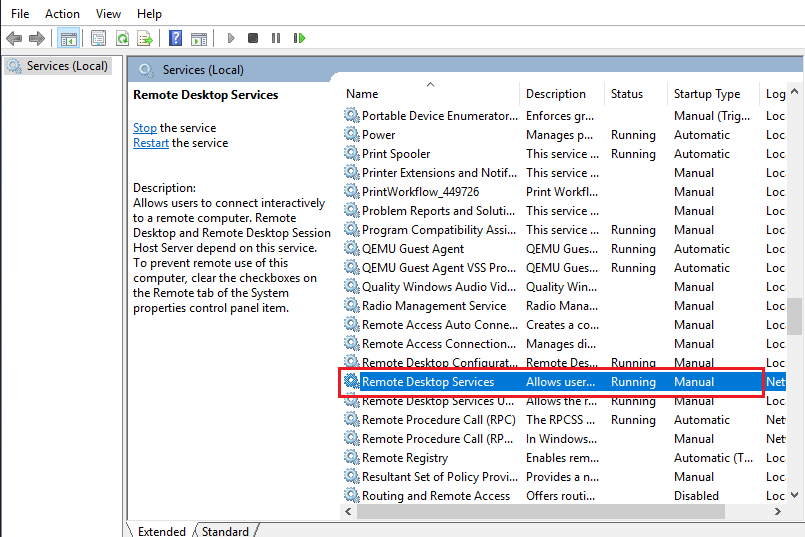
- This will open the Services (Local) console. Search for Remote Desktop Services and select it. Stop and Restart the Remote Desktop Services.
- Try reconnecting the RDP.
Also Read: How to Access your Windows VPS using RDP on Apple Mac?
Solution 2: Allow Remote Connections
Try the following steps:
- Locate the This PC icon on your computer’s desktop. Alternatively, click on Start >> Windows System >> File Explorer.
- In the File Explorer window, locate This PC from the left panel.
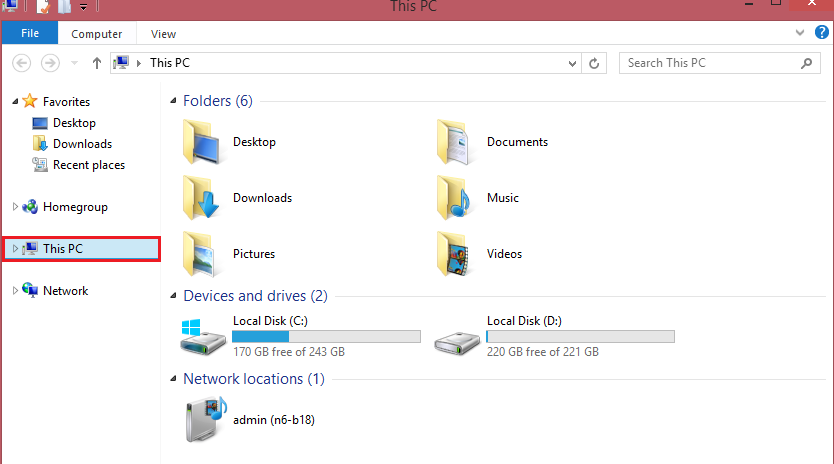
- Right-click on This PC icon and select Properties. This will open your computer’s settings window.
Also Read: How to restart the RDP without rebooting the windows server?
Solution 3: Ensure Remote Desktop Connection settings are correct
A little tweak to the RDP settings would prove good enough to fix this issue the RDP internal error.
Try the following steps:
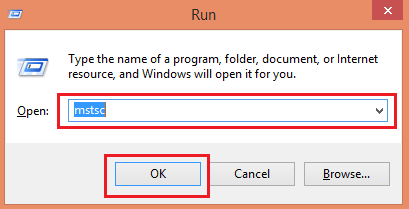
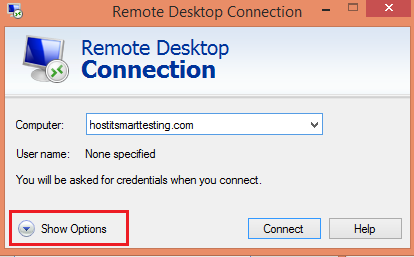
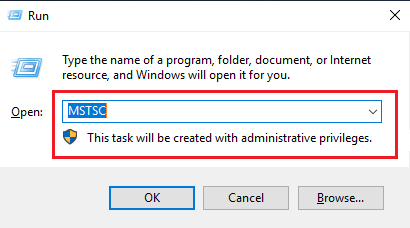
- Press the Win+R combination to open the Run command. Type the command MSTSC and press Enter key.
- A dialogue box will appear when you click on the Show Options button.
- Click on the Experience Tab and make sure the “Reconnect if the connection is dropped” option is selected.
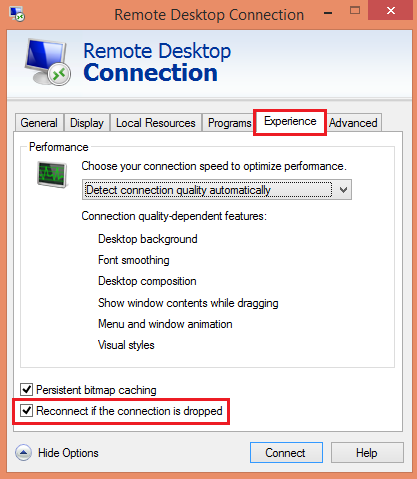
- This calls for a reconnection. Reconnect the RDP.

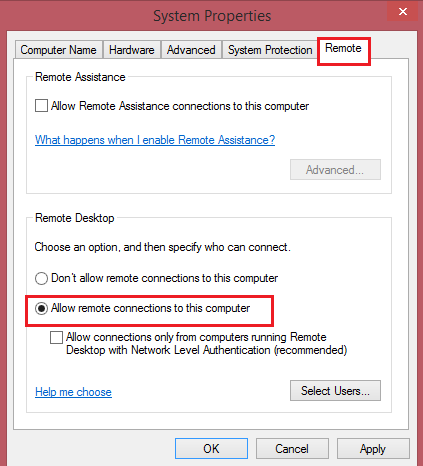
- Locate and click on Remote Desktop from the left panel.
- For this step, you must be logged in with admin privileges. Please ensure that Enable Remote Desktop is ON.
Also Read:How to Connect to FTP Using FileZilla on Windows
Solution 4: Disable the Network Level Authentication
When it comes to network security, Network Level Authentication plays an important role. Let us consider the Network Level Authentication as a temporary tool to resolve the RDP Internal Error.
The steps mentioned here will deliver temporary relief. By default, the Network Level Authentication should remain Enabled. Re-reverting to the default settings is recommended once the issue is resolved.
Try the following steps:
- Go to the control panel on your PC.
- Click on the System and Security >> System >> Advanced System Settings >> Remote settings >> Go to RDP Tab.

- Uncheck the “Allow connection only from computers running Remote Desktop with Network Level Authentication (recommended).”
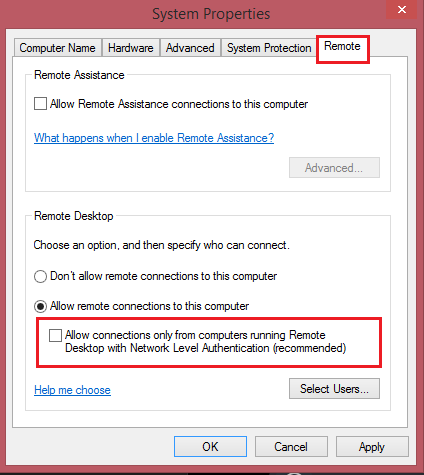
- Click on the OK button and try reconnecting the RDP.
Also Read:A Simple Guide To Connect Your cPanel Email to Gmail
Solution 5: Modify the Startup of Services
You can configure the RDP Services to start automatically.
- Press the Win+R combination to open the Run command.
- Type the command Services.msc and press OK.
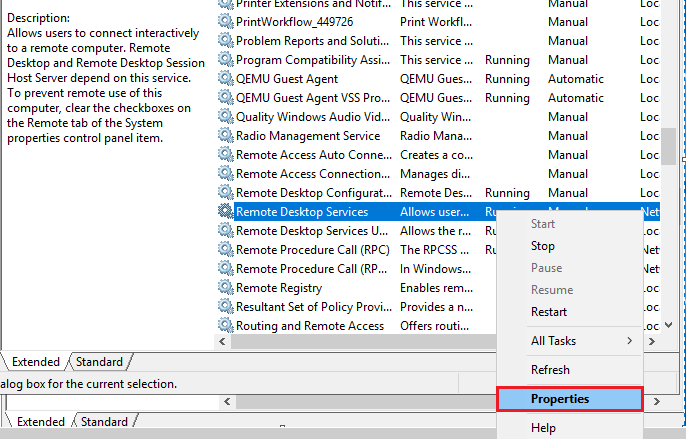
- From the Services console, locate Remote Desktop Services.
- Right-click on it and select Properties.
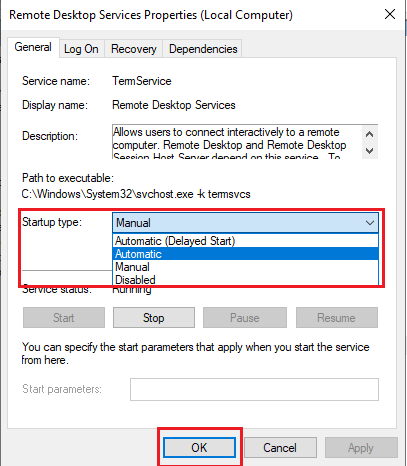
- Go to the Startup Type, select the Automatic option from the drop-down, and click the OK button.
- Verify if your RDP connection has been established.
Also Read: move an email account from one cPanel server to another
Solution 6: Disabling static IP on your Computer
If you configure your Remote Desktop Connection to use a static IP address, your computer’s network adapter will not synchronize properly with the Remote Desktop Connection. It may further cause an internal RDP error on your computer.
Try the following steps to disable the static IP address and allow the system to obtain it dynamically.
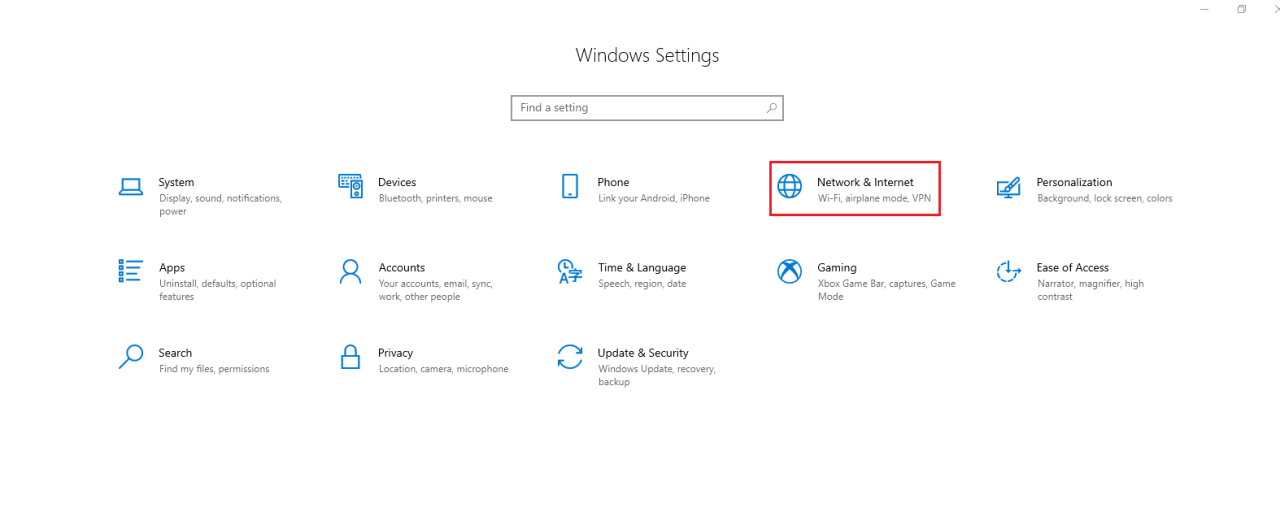
- Press Start and type Settings in the search bar. This will open the Windows Settings console.

- Click on Network and Internet.
- Select and click on Ethernet from the left panel.
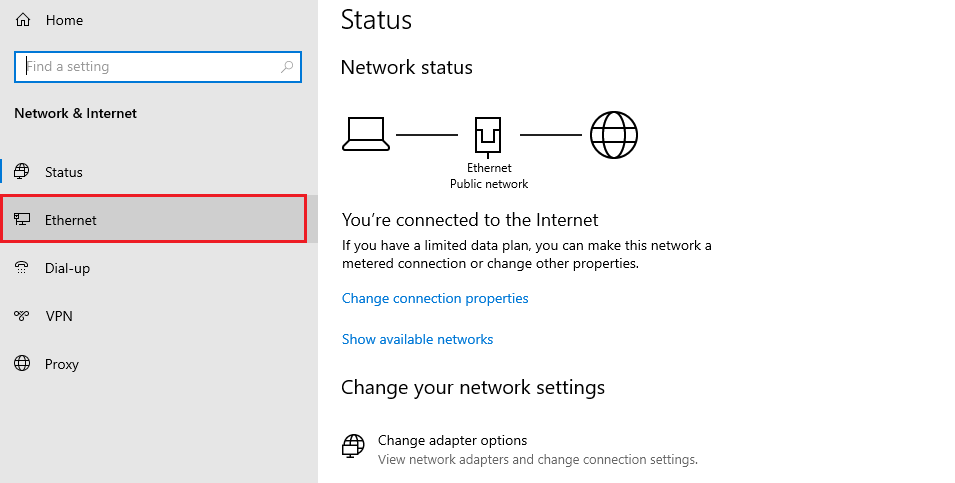
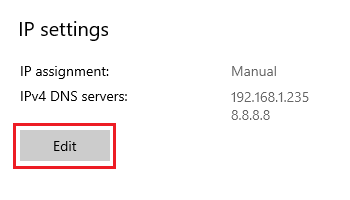
- Select the name from the right panel. This will open the Metered Connection page. Press Edit under IP settings.
This will open the Edit IP settings pop-up. Click on the 1st drop-down, select Automatic (DHCP) instead of Manual and click on Save.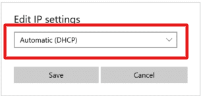
- Restart your computer for this modification to take effect.
Also Read:What is FTP & How to Create an FTP Account In cPanel?
Solution 7: Disabling the VPN Settings
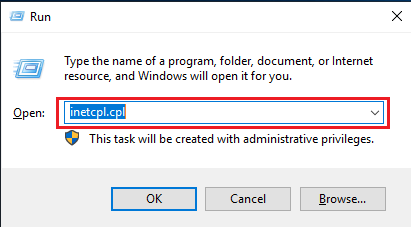
We will use the command inetcpl.cpl over here.
- Press the Win+R combination to open the Run command.
- Type the command inetcpl.cpl and press OK.
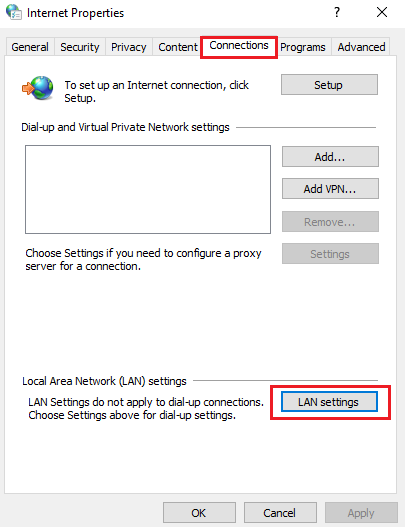
- This will open the Internet Options window. Click on the Connections Button, followed by the LAN Settings button.
- Uncheck the “Use a proxy server for your LAN” checkbox and press OK.
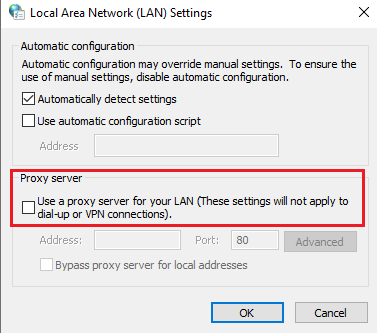
- Restart your computer for this modification to take effect.
Also Read: Is Your Cpanel Not Receiving Emails-What to Do?
Solution 8: Modifying Your Local Security Policy
Modifying your computer’s local security policy might come as a solution to your Internal RDP issue.
We will use the command Secpol.msc over here.
- Press the Win+R combination to open the Run command.
- Type the command Secpol.msc and press OK.

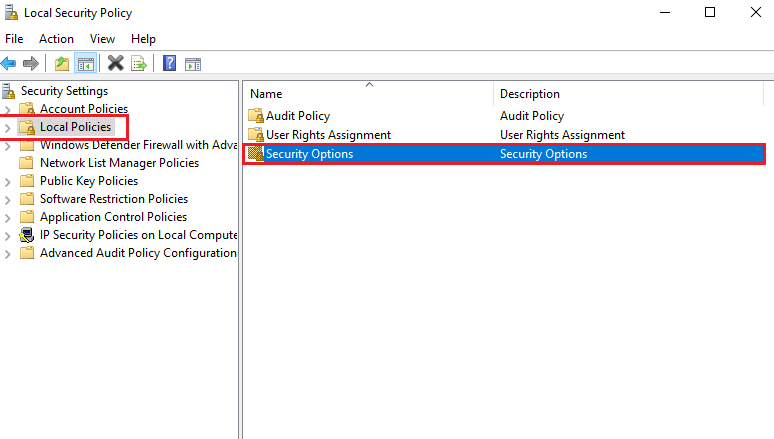
- In the Local Policies, go to Security Options.
- Scroll down & locate the Policy: “System Cryptography: Use FIPS compliant cryptographic algorithms, including encryption, hashing, and signing algorithms option.”
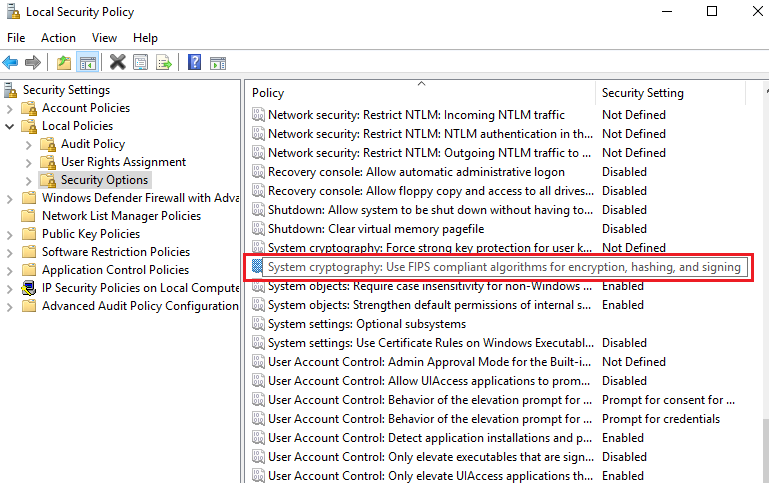
- Restart your computer. Double-click on it and checkmark on Enable.
Also Read:How to upload Laravel Project on Shared Hosting With cPanel?
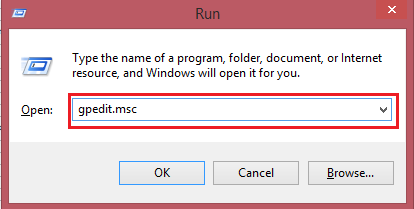
Solution 9: Modifying RDP Security in Group Policy Editor
We will use the command gpedit.msc over here.
- Press the Win+R combination to open the Run command.
- Type the command gpedit.msc and press OK.
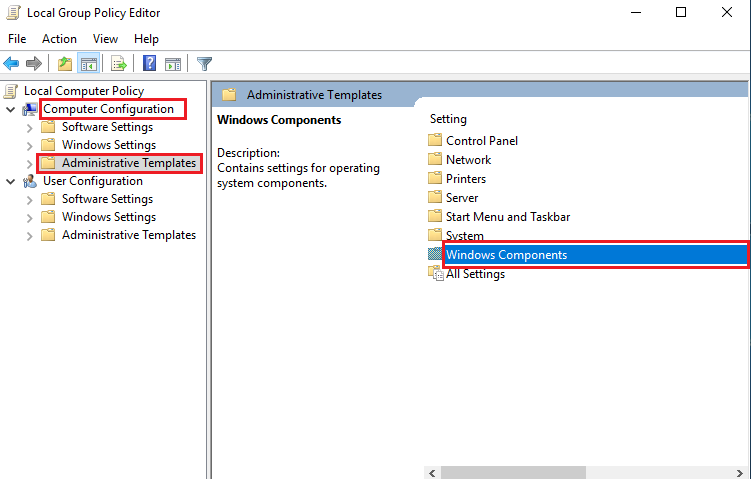
- Now, you will see a Directory Structure. Navigate to Computer Configuration > Administrative Templates > Windows Components.
Remote Desktop Services > Remote Desktop Session Host > Security.
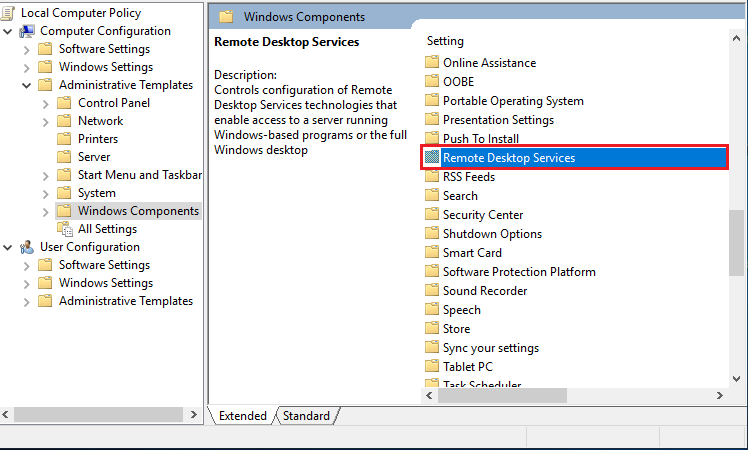
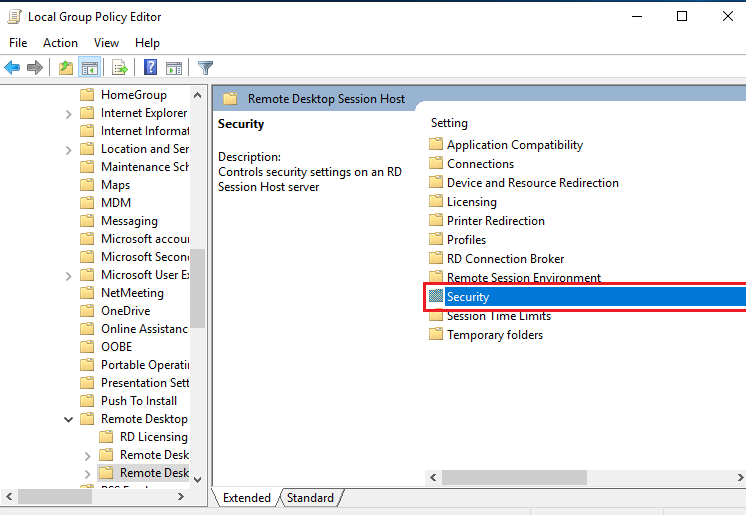
- You must right-click on Require use of specific security layer for remote (RDP) connections. Select the Edit button.
- Click on the Enable radio button to set RDP at Security Layer.
- Click on the OK button. Restart your computer for this modification to take effect.
Also Read:How to Redirect HTTP to HTTPS in htaccess?
Solution 10: Tune the Computer’s Firewall for RDP connection
There are major chances that the firewall on the Server might be blocking your RDP connection. Ports are a great help in establishing connections. Hence, you must ensure that the inbound rules on the server permit the RDP traffic received through Port #3389.
If you use a port other than 3389, you must mention it in your Windows Firewall.
Try the following steps:
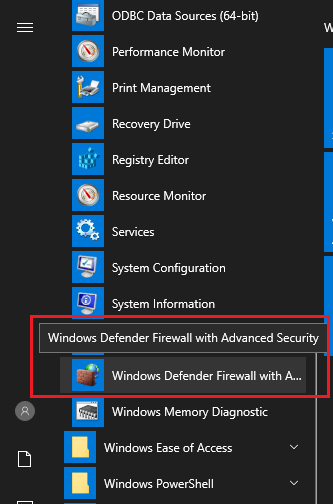
- Press Start and type Administrative Tools in the search bar.
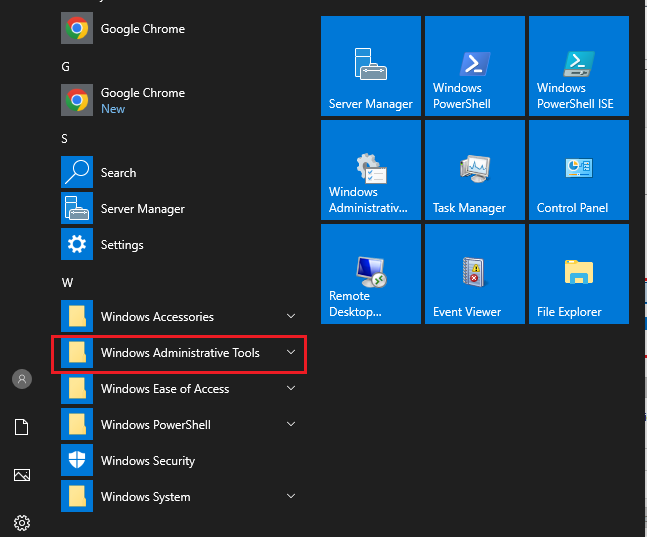
- Locate Windows Firewall with Advanced Security and double-click to open it.
- Select and click on Inbound Rule >> New Rule >> select port. Specify the New Port to be used.
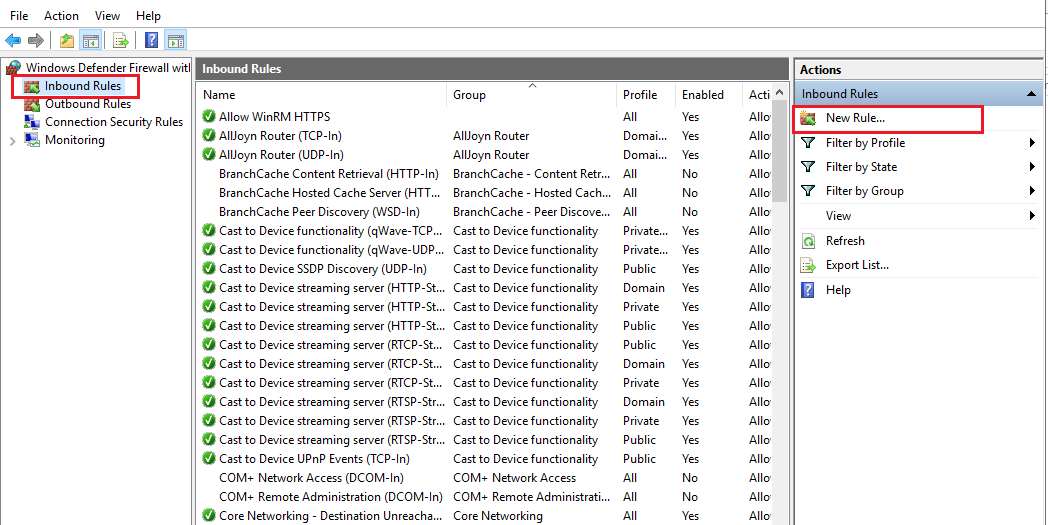
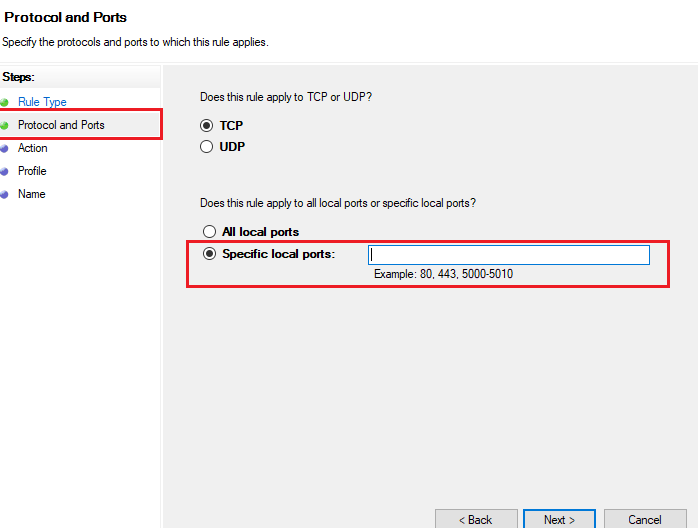
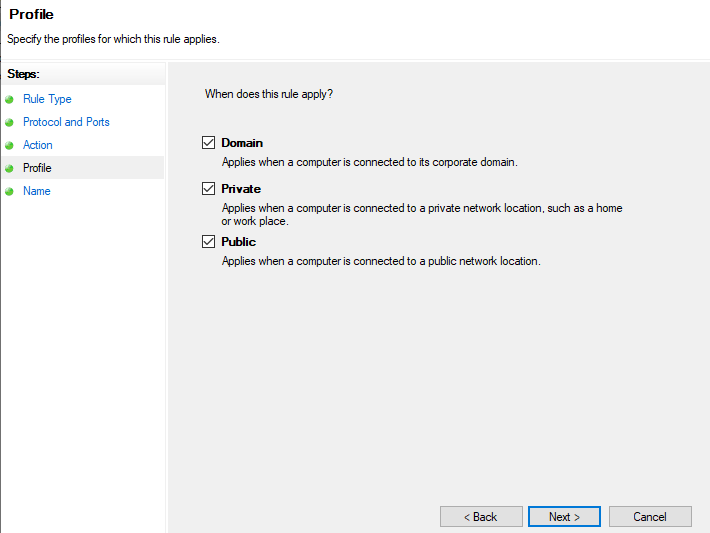
- From the Action Tab, permit the connection to Domain, private and public.
- Name this New Rule and click on Finish.
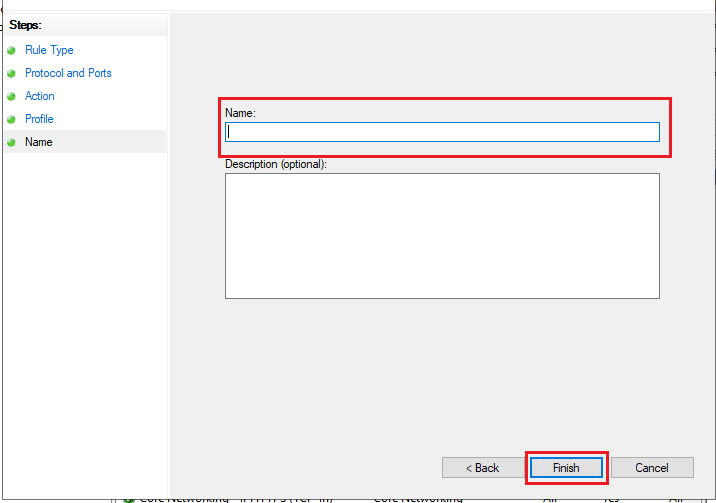
- Verify if your RDP connection has been established.
Also Read: How to Add a New Domain To Cpanel?
Solution 11: Modifying MTU Value
The Maximum Transmission Unit, or MTU, is the packet size value transmitted through the network. Changing the MTU value should resolve your issue.
Try the following steps:
- Download the TCP Optimizer and use it to alter the MTU value.
- Run the downloaded TCP Optimizer as an administrator.
- Move to the bottom of the dialogue box, and select custom.
- Set the MTU value to 1658.
- Click on Apply and Exit for changes to take effect.
- Reconnect your computer.
Also Read: How to Create a Subdomain For Your Website
Solution 12: Enabling Persistent Bitmap Caching
We will use the command MSTSC over here.
- Press the Win+R combination to open the Run command.
- Type the command MSTSC and press OK.
- Click “Show Options.”

- Go to the Experience Tab and checkmark the “Persistent bitmap caching.”
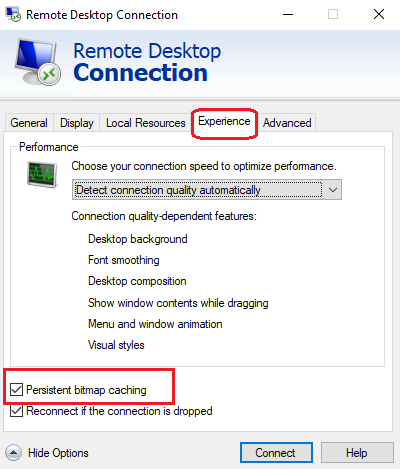
- Reconnect your computer.